Garlic bread lovers, meet your new obsession-air fryer garlic bread! With crusty baguette slices with a creamy butter, garlic, and Parmesan cheese mixture, this recipe skips the oven and delivers big flavour in minutes. It’s a guaranteed crowd-pleaser, perfect as a cozy soup side or a snack you can't stop eating!

This is my go-to recipe for simple, classic garlic bread-no fuss, just pure garlicky goodness. We'll save the gooey cheesy garlic bread for another day because this one shines in its simplicity.
The air fryer works its magic, creating perfectly crisp and golden garlic bread on the outside with a soft, pillowy center. It's fast, it's easy, and yes, everyone will love it.
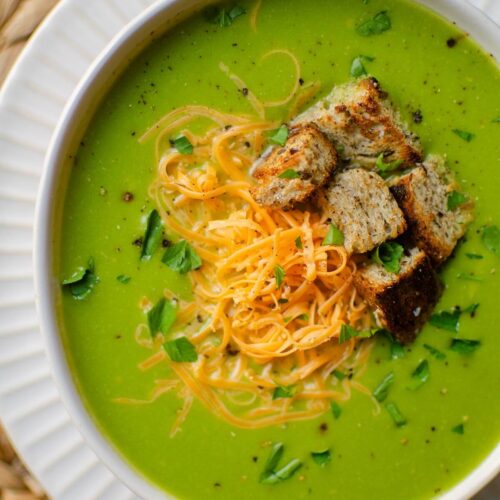
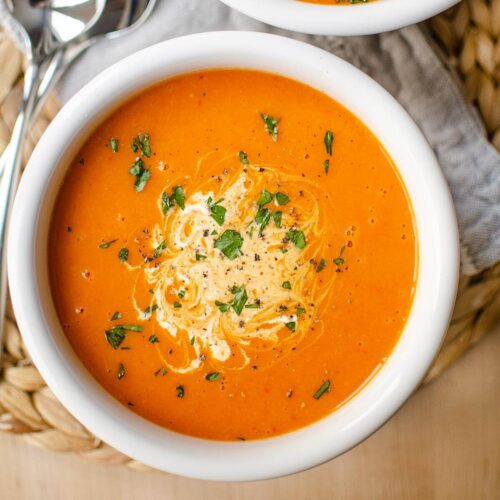
I love to serve this with Broccoli and Cauliflower Soup, Dutch Oven Chili or Slow Cooker Meatballs in Tomato Sauce.
📋 Ingredients you'll need
There is nothing fancy here, you will have all of the ingredients on hand already.

- Go for a fresh, crusty baguette-it gives you that perfect crispy texture on the outside while staying soft and tender inside. Make sure the loaf fits in your air fryer; you might need to cut it to size (don't worry, I've got tips for that below!).
- Softened salted butter is a must for easy spreading. I always reach for salted butter in savory recipes.
- Freshly minced garlic is the secret to bold, classic flavor. Trust me, the fresher, the better!
- Italian seasoning, this versatile dried herb blend brings loads of flavor.
- A pinch of salt helps to balance the flavors.
- Grated parmesan adds a touch of umami and helps create that irresistible crispy, crunchy finish.
🔪 Step by step instructions
This recipe is straightforward to make, let’s go!

Mix the butter, Parmesan cheese, minced garlic, Italian seasoning, and salt in a small bowl.

Mix until well combined.

Prepare the baguette by slicing it in half lengthwise and cutting it into pieces that fit in your air fryer. I cut the bread into quarters for my air fryer.

Spread each piece evenly with butter mixture.

Line an air fryer basket with tinfoil (this will help with cleanup and avoid the butter burning). Add slices of bread and air fry at 350F for 3-5 minutes.

Keep an eye on the garlic bread around the 3-minute mark if it starts to brown too quickly.
💭 Cooking tips
- Don't overcrowd the air fryer: Ensure the bread slices are in a single layer so they crisp evenly. I tend to do this in four batches.
- Keep an eye on the cooking time: Air fryers vary; start checking at the lower end of the cooking time to avoid over-browning.
- Use softened or room temperature butter: This ensures it spreads easily and evenly across the bread.
- If you’re using an air fryer with a basket, line it with aluminum foil: This will help with easy cleanup and avoid the butter burning at the bottom of the air fryer. Check your air fryer’s instructions to ensure it’s compatible with aluminum foil.

What to serve this with
These are my favorite dishes to serve with this garlic bread:


Air Fryer Garlic Bread
Ingredients
- 1 baguette, halved lengthwise, and cut into quarters
- ¼ cup salted butter, softened
- 2 tablespoon grated Parmesan
- 2 garlic cloves, minced
- ¼ teaspoon Italian seasoning
- ¼ teaspoon salt
Instructions
- Preheat the air fryer: If your air fryer requires preheating, set it to 350F. For basket-style air fryers, line the basket with aluminum foil if recommended by the manufacturer.
- Prepare the baguette: Slice it in half lengthwise, then cut it into pieces that will fit in your air fryer. For most air fryers, quarters work well (you’ll have eight pieces of bread).
- Make the garlic butter: In a small bowl, mix softened butter, grated Parmesan, minced garlic, Italian seasoning, and salt until smooth and well combined.
- Spread the garlic butter mixture evenly over each piece of bread.
- Place the slices in a single layer in the air fryer basket. Depending on your air fryer's size, you may need to cook in batches (mine fits two pieces at a time). Air fry for 3-5 minutes or until the edges are golden and crispy.
Notes
- Air fryers vary; start checking your garlic bread at around the 3-minute mark to avoid over-browning.
- There will be some melted butter at the bottom of the pan, it’s ok.
kim
Lou
Abby
Lou
Pamela @ Brooklyn Farm Girl
Lou
Shirley
Lou